How to install a pressure switch with a household macerator pump?
Leave a message
Hey there! As a supplier of household macerator pumps, I often get asked about how to install a pressure switch with a household macerator pump. It might seem like a daunting task, but with the right guidance, it can be a breeze. In this blog, I'll walk you through the whole process step by step.
First off, let's talk about why you'd want to install a pressure switch with your macerator pump. A pressure switch is super important as it helps control when the pump turns on and off. It senses the pressure in the system, and when the pressure reaches a certain level, it triggers the pump to start or stop. This not only ensures the efficient operation of your macerator pump but also helps prevent any potential damage due to over - working.
What You'll Need
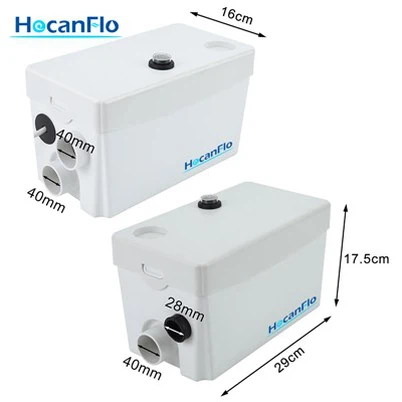
Before you start the installation, gather all the necessary tools and materials. You'll need a pressure switch (make sure it's compatible with your 300w Macerator Lifting Pump), a set of wrenches, some electrical tape, wire strippers, and a screwdriver. Also, don't forget safety gear like gloves and safety glasses.
Step 1: Turn Off the Power
Safety first! Before you start any work on the pump or the pressure switch, turn off the power supply to the macerator pump. You can do this by flipping the breaker switch in your electrical panel. This will prevent any electrical shocks while you're working.


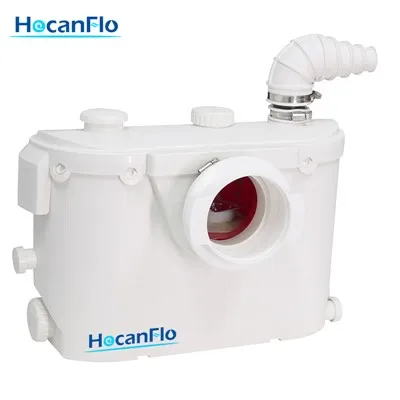
Step 2: Locate the Pressure Port
The next step is to find the pressure port on your macerator pump. This is where you'll connect the pressure switch. Usually, it's a small opening on the side of the pump. Refer to your pump's manual if you're having trouble finding it.
Step 3: Remove the Plug
Once you've located the pressure port, there's likely a plug in it. Use a wrench to carefully remove this plug. Be gentle so you don't damage the port.
Step 4: Connect the Pressure Switch
Now it's time to connect the pressure switch to the pressure port. Wrap some Teflon tape around the threads of the pressure switch to create a tight seal. Then, use a wrench to screw the pressure switch into the port. Make sure it's tightened properly, but don't over - tighten it as this could damage the switch or the port.
Step 5: Electrical Connections
This is a crucial step. First, strip the ends of the electrical wires using wire strippers. Then, connect the wires from the pump to the appropriate terminals on the pressure switch. Usually, there are markings on the switch to indicate which wires go where. Double - check your connections to make sure they're secure. Once the connections are made, cover them with electrical tape to prevent any short - circuits.
Step 6: Adjust the Pressure Settings
Most pressure switches come with adjustable settings for the cut - in and cut - out pressures. The cut - in pressure is the level at which the pump starts, and the cut - out pressure is when it stops. You'll need to adjust these settings according to your specific needs. Refer to the pressure switch's manual for detailed instructions on how to make these adjustments.
Step 7: Test the System
After you've completed all the connections and adjustments, it's time to test the system. Turn the power back on at the breaker switch. Then, let some water flow into the macerator pump. The pressure switch should sense the change in pressure and start the pump when the cut - in pressure is reached. The pump should stop when the cut - out pressure is reached. If everything works as expected, congratulations! You've successfully installed the pressure switch.
Common Mistakes to Avoid
- Not Turning Off the Power: This is a big no - no. Always turn off the power before working on any electrical components to avoid electrical shocks.
- Using the Wrong Pressure Switch: Make sure the pressure switch you choose is compatible with your Macerator Pump For Home. Using an incompatible switch can lead to improper operation and potential damage.
- Over - Tightening Fittings: When connecting the pressure switch to the pump, don't over - tighten the fittings. This can damage the threads and cause leaks.
Maintenance Tips
- Regular Inspections: Periodically check the pressure switch for any signs of wear or damage. Look for loose connections, cracked wires, or any other issues.
- Clean the Pressure Port: Over time, debris can accumulate in the pressure port. Clean it regularly to ensure accurate pressure sensing.
- Calibrate the Pressure Switch: Every once in a while, calibrate the pressure switch to make sure it's still functioning correctly.
When to Call a Professional
If you're not comfortable working with electrical components or if you encounter any problems during the installation process, it's best to call a professional. A licensed plumber or electrician can ensure that the pressure switch is installed correctly and safely.
As a supplier of high - quality household macerator pumps, I'm here to help you with all your pumping needs. Whether you're looking for a Macerator Pump For Kitchen Sink or a more powerful model, we've got you covered. If you're interested in purchasing our products or have any questions about installation or maintenance, don't hesitate to reach out to us. We're always happy to assist you in finding the right solution for your home.
References
- Manufacturer's manuals for the macerator pump and pressure switch
- General plumbing and electrical installation guides