What tools are needed to install a marine toilet?
Leave a message
When it comes to equipping a marine vessel with a functional and reliable toilet system, understanding the necessary tools for installation is crucial. As a reputable Marine Toilet supplier, I've witnessed firsthand the importance of having the right equipment on hand to ensure a smooth and successful installation process. In this blog post, I'll walk you through the essential tools you'll need to install a marine toilet, along with some tips and considerations to keep in mind.
Basic Hand Tools
First and foremost, you'll need a set of basic hand tools to handle the various tasks involved in installing a marine toilet. These tools are commonly found in most toolboxes and are essential for tasks such as removing old fixtures, tightening bolts, and making adjustments.
- Adjustable Wrench: An adjustable wrench is a versatile tool that allows you to tighten or loosen nuts and bolts of various sizes. It's essential for connecting water supply lines, securing the toilet to the floor, and making adjustments during the installation process.
- Screwdriver Set: A set of screwdrivers with different sizes and types of heads (Phillips and flathead) is necessary for removing and installing screws. You'll use screwdrivers to attach the toilet seat, secure the toilet to the floor flange, and access internal components of the toilet.
- Pliers: Pliers are useful for gripping, bending, and cutting wires, hoses, and other materials. You'll need pliers to connect water supply lines, tighten hose clamps, and remove old gaskets or seals.
- Hacksaw: A hacksaw is a cutting tool that can be used to trim pipes, remove old fixtures, or make custom cuts as needed. You may need a hacksaw to cut PVC pipes to the appropriate length or to remove a damaged section of pipe.
- Level: A level is used to ensure that the toilet is installed perfectly horizontal and vertical. This is important for proper drainage and to prevent the toilet from rocking or wobbling. Use a spirit level to check the alignment of the toilet during installation and make adjustments as necessary.
Plumbing Tools
Since a marine toilet is connected to a water supply and a waste disposal system, you'll need a few specialized plumbing tools to complete the installation. These tools are designed to work with pipes, fittings, and seals to ensure a leak-free connection.
- Pipe Cutter: A pipe cutter is a tool used to cut pipes cleanly and accurately. It's essential for cutting PVC, copper, or other types of pipes to the correct length. Using a pipe cutter ensures a smooth, even cut that is free of burrs, which can cause leaks or blockages in the plumbing system.
- Pipe Wrench: A pipe wrench is a large, adjustable wrench designed specifically for gripping and turning pipes. It's used to tighten or loosen pipe fittings, such as couplings, elbows, and unions. A pipe wrench provides a strong grip on the pipe, allowing you to apply the necessary torque to make a secure connection.
- Teflon Tape: Teflon tape, also known as plumber's tape, is a thin, white tape that is used to seal threaded pipe connections. Wrap the tape around the threads of the pipe before installing the fitting to prevent leaks. Teflon tape creates a watertight seal and helps to prevent corrosion and rust.
- Pipe Sealant: In addition to Teflon tape, you may also need a pipe sealant to ensure a leak-free connection. Pipe sealant is a liquid or paste that is applied to the threads of the pipe before installing the fitting. It fills in any gaps or imperfections in the threads and provides an extra layer of protection against leaks.
- Caulk Gun: A caulk gun is used to apply caulk, a flexible sealant that is used to seal gaps and joints around the toilet. Caulk helps to prevent water from seeping under the toilet and causing damage to the floor or subfloor. Use a caulk gun to apply a bead of caulk around the base of the toilet and along the edges of the toilet seat.
Electrical Tools (if applicable)
If you're installing an 12v Electric Marine Toilet or an Electric Marine Toilet, you'll need some electrical tools to connect the toilet to the power supply. These tools are essential for ensuring a safe and proper electrical connection.
- Wire Strippers: Wire strippers are used to remove the insulation from electrical wires. They come in different sizes and are designed to strip wires of various gauges. Use wire strippers to expose the bare wire before making electrical connections.
- Electrical Tape: Electrical tape is a flexible, insulating tape that is used to wrap electrical connections and protect them from moisture and short circuits. Wrap electrical tape around the exposed wires after making a connection to ensure a secure and safe electrical connection.
- Multimeter: A multimeter is a tool used to measure electrical voltage, current, and resistance. It's essential for testing the electrical system and ensuring that the toilet is receiving the correct voltage. Use a multimeter to check the power supply, test the continuity of the wires, and troubleshoot any electrical problems.
Additional Tools and Materials
In addition to the basic hand tools, plumbing tools, and electrical tools, you may also need a few additional tools and materials to complete the installation of a marine toilet. These items can vary depending on the specific model of the toilet and the requirements of your installation.
- Putty Knife: A putty knife is used to apply and remove putty, caulk, and other sealants. You'll use a putty knife to spread caulk around the base of the toilet and to remove old putty or sealant from the floor flange.
- Safety Glasses and Gloves: Safety glasses and gloves are essential for protecting your eyes and hands during the installation process. Wear safety glasses to prevent debris from getting into your eyes and gloves to protect your hands from sharp edges, chemicals, and other hazards.
- Measuring Tape: A measuring tape is used to measure the dimensions of the toilet, the floor flange, and the water supply lines. Accurate measurements are important for ensuring a proper fit and alignment of the toilet.
- Cleaning Supplies: Cleaning supplies, such as a bucket, sponge, and cleaning solution, are necessary for cleaning the installation area and the toilet before and after installation. Clean the floor flange and the surrounding area to remove any dirt, debris, or old sealant. Wipe down the toilet to remove any dust or fingerprints.
Tips and Considerations
- Read the Installation Manual: Before you begin the installation process, carefully read the installation manual that comes with the toilet. The manual will provide detailed instructions and diagrams specific to your model of the toilet, including the tools and materials you'll need, the installation steps, and any safety precautions.
- Plan the Installation: Take the time to plan the installation carefully. Measure the space where the toilet will be installed to ensure that it will fit properly. Consider the location of the water supply lines, the waste disposal system, and any other obstacles or constraints. Plan the routing of the pipes and wires to minimize bends and turns and to ensure a smooth flow of water and waste.
- Follow the Manufacturer's Recommendations: Follow the manufacturer's recommendations for the installation of the toilet. This includes using the recommended tools and materials, following the correct installation steps, and adhering to any safety precautions. Failure to follow the manufacturer's recommendations could void the warranty and may result in a faulty installation.
- Test the Toilet: Once the installation is complete, test the toilet to ensure that it is working properly. Check for leaks, proper flushing, and drainage. Run a few test flushes to make sure that the water is flowing smoothly and that the waste is being properly disposed of. If you notice any problems, refer to the installation manual or contact the manufacturer for assistance.
Conclusion
Installing a marine toilet requires a combination of basic hand tools, plumbing tools, and electrical tools (if applicable). By having the right tools on hand and following the proper installation procedures, you can ensure a smooth and successful installation process. As a Marine Toilet supplier, we're committed to providing high-quality products and excellent customer service. If you have any questions or need assistance with the installation of a marine toilet, please don't hesitate to contact us. We're here to help you find the right toilet for your needs and to ensure that it is installed correctly.
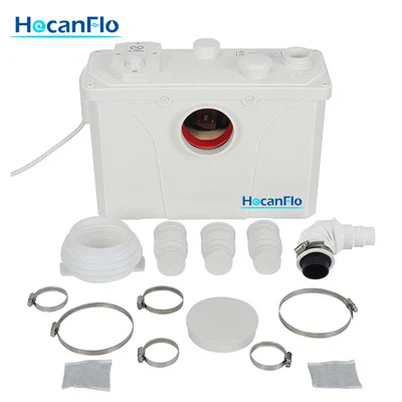
If you're interested in purchasing a 600w Compact Macerator Toilet or any other type of marine toilet, please feel free to reach out to us for more information and to discuss your specific requirements. Our team of experts is ready to assist you with your purchase and to provide you with the support you need to make an informed decision.
References
- "Marine Toilet Installation Guide," Various Manufacturers
- "Plumbing Handbook," Professional Plumbing Associations